ChatGPT
OpenAI에서 chatGPT를 공개한지 거의 1년이 다되어 가는군요.(2022년 11월 30일)
아이폰 출시에 맞먹는 충격이라고 불릴만큼 그 여파가 엄청 났고, 파생 상품들도 많이 쏟아졌죠.
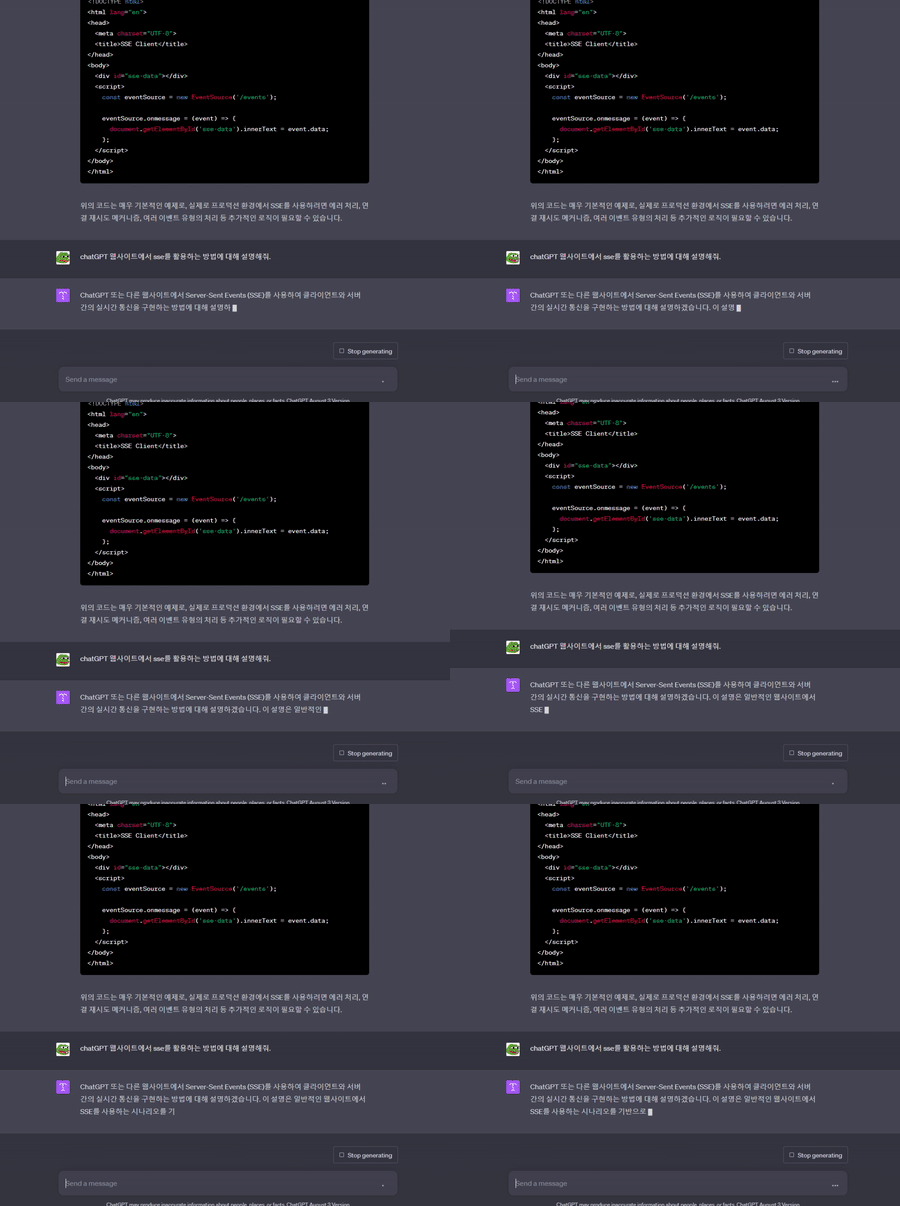
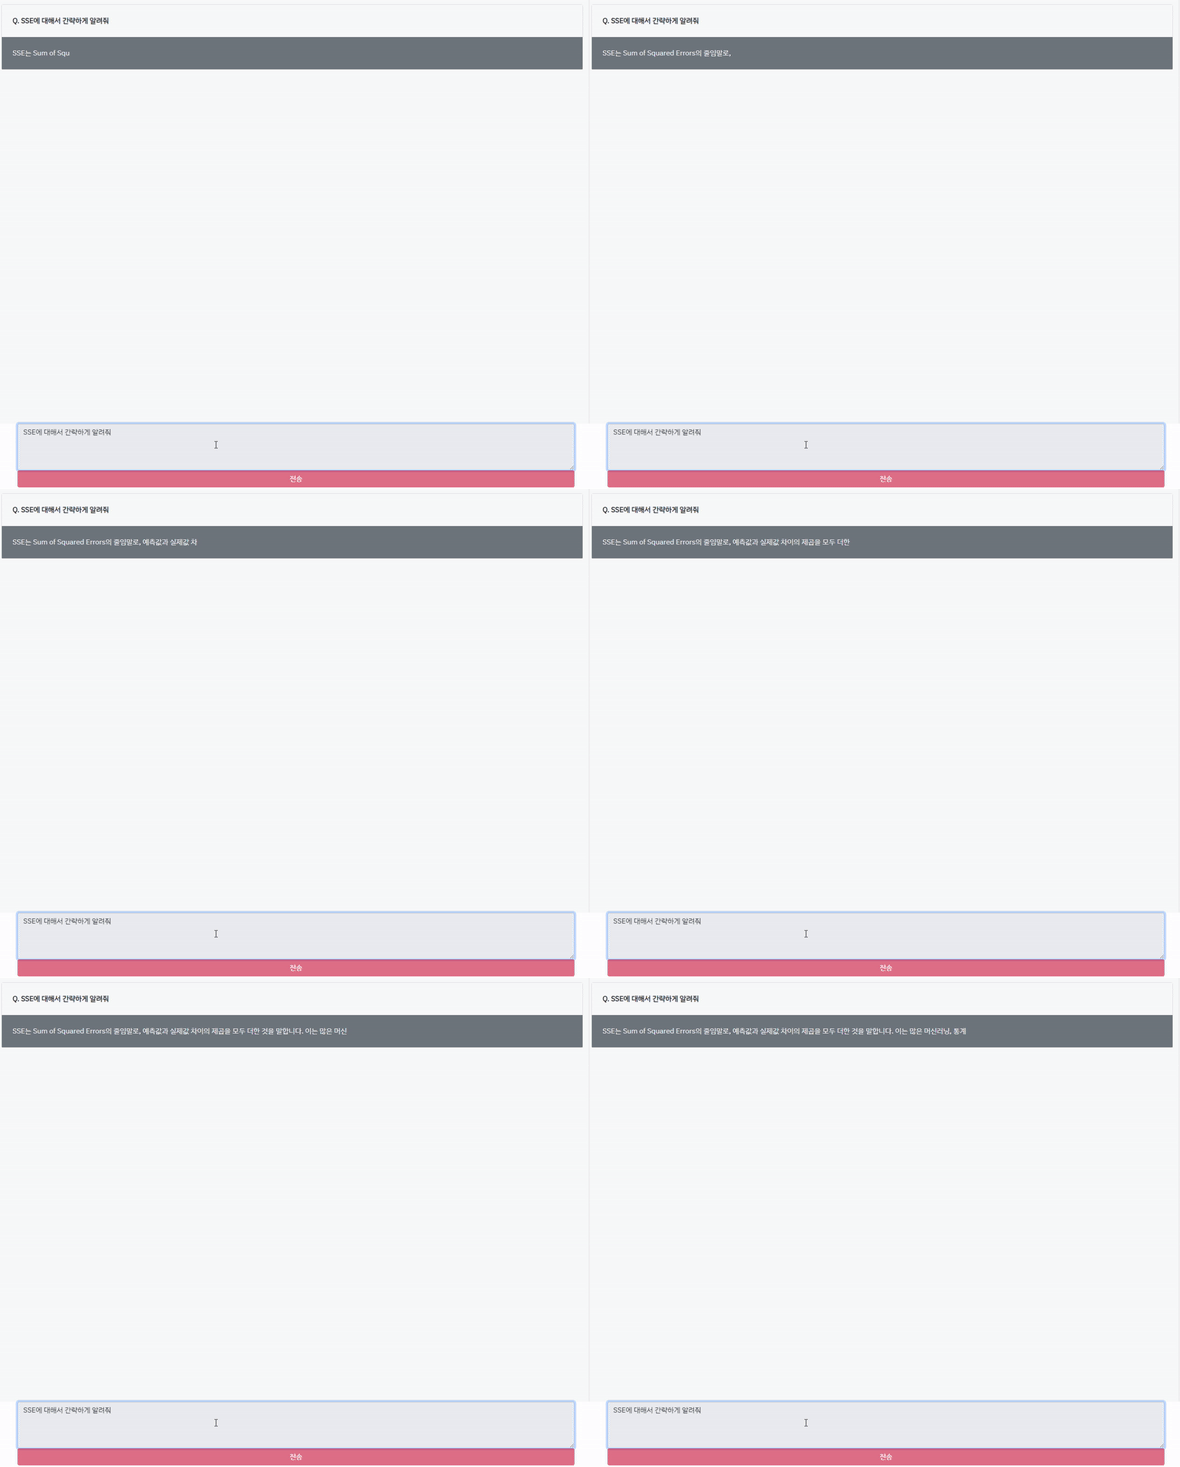
chatGPT에서 프롬프트를 입력하면 한글자씩 넘어오는 걸 볼 수 있습니다.

개발자 도구를 보니 web socket이나 polling 방식도 아니였습니다. 여기서 활용된 기술이 오늘 소개드릴 SSE입니다.
SSE(Server-Sent Events)
전통적으로 웹페이지는 새로운 데이터를 받기 위해 서버로 요청을 보내야만 합니다; 서버로 데이터를 요청하는 방식입니다. 하지만 Server-Sent Events 방식으로 웹페이지의 요청 없이도 언제든지 서버가 새로운 데이터를 보내는 것이 가능합니다. 이렇게 보내진 메시지는 웹페이지 안에서 Events + 데이터로 다룰 수 있습니다.
출처: https://developer.mozilla.org/ko/docs/Web/API/Server-sent_events
SSE는 서버에서 클라이언트로 데이터를 보내는 단방향 통신입니다.
많이 활용되는 websocket은 앙뱡향 통신이죠. SSE는 단방향 통신이기 때문에 쓰임에 맞다면 websocket보다 더 가볍고 간단하게 구현할 수 있습니다.

클라이언트는 브라우저에 접속하면 서버에 접속 요청을하고 서버는 접속 응답을 합니다. 이후 서버는 클라이언트에게 데이터를 보내고 클라이언트는 이벤트를 받기만 합니다.
ChatGPT를 만들어보자
OpenAI node.js API와 sse를 활용해서 chatGPT webapp과 비슷하게 구성을 해보겠습니다.
└── src/
    ├── lib/
    │   ├── store.ts
    │   ├── subscribe.ts
    │   └── openai.api.ts
    ├── public/
    │   └── index.js
    ├── views/
    │   └── index.ejs
    └── app.ts
backend
lib/store.ts (클라이언트 정보 저장용)
import { Response } from 'express';
export const subscriptions: Record<string, Response> = {};


export const getSubscriber = (userId: string) => {
  return subscriptions[userId];
}

export const setSubscriber = (userId: string, res: Response) => {
  subscriptions[userId] = res;
}

export const deleteSubscriber = (userId: string) => {
  delete subscriptions[userId];
}
store에는 클라이언트의 response를 관리하는 subscriptions 객체가 있습니다.
lib/subscribe.ts (sse 구독용)
import { Request, Response } from 'express';
import { setSubscriber, getSubscriber, deleteSubscriber } from './store';
export default async function subscribe(req: Request, res: Response) {

    const { session } = req;

    const headers = {
        'Content-Type': 'text/event-stream',
        'Connection': 'keep-alive',
        'Cache-Control': 'no-cache'
    };

    res.writeHead(200, headers);

    const userId = session.id;

    res.write(`event: open\n`);
    res.write(`data: ${JSON.stringify({id: userId})}\n\n`);
    setSubscriber(userId, res);

    req.on('close', () => {
        const stream = getSubscriber(userId)?.locals.stream;
        if (stream && stream.controller) stream.controller.abort();
        deleteSubscriber(userId);
    });
}
subscribe.ts는 클라이언트와 SSE 연결을 맺고 클라이언트의 response를 store에 저장합니다.
클라이언트가 연결을 끊으면 store에서 해당 클라이언트의 response를 삭제합니다.
abort는 OpenAI nodejs SDK에서 제공하는 stream을 중단시키는 메서드입니다.
https://github.com/openai/openai-node
여기서 주목할만한 부분은 content-type이 text/event-stream이라는 것입니다. 이것은 SSE를 위한 content-type입니다.
lib/openai.api.ts (openai api 호출용)
import { Request, Response } from 'express';
import { getSubscriber } from './store';
import OpenAI from 'openai';
const openai  = new OpenAI({
    apiKey: process.env.OPENAI_API_KEY
});
export const requestAPI = async (req: Request, res: Response) => {
    const { body: { prompt }, session } = req;
    if (!prompt) return res.status(400).send('Bad Request');

    const sessionId = session.id;
    const messageId = `message-${new Date().getTime()}`;
    const subscriber = getSubscriber(sessionId);
    if (!subscriber) return res.status(404).send('session expired');

    try {
        const result = await openai.chat.completions.create({
            model: 'gpt-4-0613',
            messages: [{
                role: 'system',
                content: prompt,
            }],
            stream: true
        });

        subscriber.locals.stream = result;

        for await (const message of result) {
            const { choices, id } = message;

            subscriber.locals.messageId = id;
            const finished = choices[0]?.finish_reason;
            const content = choices[0]?.delta?.content || '';

            // process.stdout.write(content);
            const data = {
                type: 'message',
                content,
                messageId,
                prompt,
            };

            // MARK: 이벤트이름 전송
            subscriber.write(`event: message\n`);
            // MARK: 데이터 전송
            subscriber.write(`data: ${JSON.stringify(data)}\n\n`);

            if (finished === 'stop') {
                // MARK: 날짜 전송
                subscriber.write(`event: date\n`);
                subscriber.write(`data: ${JSON.stringify({ type: 'date', messageId, content: new Date().toLocaleString() })}\n\n`);

                // MARK: 종료 이벤트 전송
                subscriber.write(`event: end\n`);
                subscriber.write(`data: ${JSON.stringify({ type: 'end', messageId })}\n\n`);
                subscriber.locals.stream = null;
                delete subscriber.locals.stream;
            }
        }
        console.warn('end');
        return res.end();
    } catch (e) {
        console.log(e);
    }
}
OpenAI node를 이용해서 chatGPT를 호출합니다.
API를 stream으로 응답받기 위해 중간에 stream: true 옵션을 넣어줍니다.
subscriber 변수에는 첫 연결시 저장했던 클라이언트의 response가 담겨있습니다.
subscriber에 서버가 이벤트를 보내게 됩니다.
subscriber.locals.stream에는 openai stream을 담았습니다. lib/subscribe.ts에서 클라이언트의 연결이 끊어지면 이 stream을 중단시킵니다.
여기서 subscriber와 res 모두 Response 객체이지만, subscriber는 클라이언트의 response이고 res는 openai api 호출의 response입니다.
sse는 데이터만 있는 메세지를 송신할 수도 있고, 이름이 있는 이벤트로 송신할 수도 있습니다.
아래와 같은 형태로 문자열로 보냅니다.
# 이름이 없는 이벤트
data: {type: 'message', content: '안녕하세요', messageId: 'message-1234', prompt: '안녕하세요'}


# 이름이 있는 이벤트
event: userconnect
data: {"username": "bobby", "time": "02:33:48"}
frontend
views/index.ejs
<!DOCTYPE html>
<html lang="ko">
<head>
    <meta charset="UTF-8">
    <title>chat GPT4</title>
    <link href="https://cdn.jsdelivr.net/npm/bootstrap@5.0.2/dist/css/bootstrap.min.css" rel="stylesheet" integrity="sha384-EVSTQN3/azprG1Anm3QDgpJLIm9Nao0Yz1ztcQTwFspd3yD65VohhpuuCOmLASjC" crossorigin="anonymous">
    <style>
        @import url('https://fonts.googleapis.com/css2?family=IBM+Plex+Sans+KR&display=swap');
    </style>
    <style>
        body {
            width: 100%;
            height: 100vh;
            font-family: 'IBM Plex Sans KR', sans-serif;
        }
        #conversation {
            height: calc(100vh - 150px);
            overflow-y: scroll;
        }
        #input {
            height: 150px;
        }
    </style>
</head>
<body>
    <div id="conversation" class="container-fluid bg-light p-4">

    </div>
    <div id="input" class="px-5 pb-2 position-fixed bottom-0 d-flex align-content-center flex-column w-100">
        <textarea class="form-control" id="prompt" rows="10">세글자 이름하나만 만들어줘</textarea>
        <div class="d-grid gap-2">
            <button id="btn" class="btn btn-danger" type="button">전송</button>
        </div>
    </div>
</body>
<script type="module" src="./index.js"></script>
</html>
html은 특별한 게 없으니 넘어가겠습니다.
public/index.js
import axios from 'https://cdn.jsdelivr.net/npm/axios@1.3.5/+esm';

const btn = document.getElementById('btn');
const prompt = document.getElementById('prompt');
const conversation = document.getElementById('conversation');

const source = new EventSource(`/openai`, {
    withCredentials: true,
});

function renderBox(messageId, prompt, content) {
    const id = `box-${ messageId }`;
    let box = document.getElementById(id);
    if (!box) {
        box = document.createElement('div');
        box.className = 'box row col card my-2';
        box.id = id;
        conversation?.appendChild(box);
    }
    sendMessage(box, messageId, prompt);
    receiveMessage(box, messageId, content);
}

function sendMessage(box, messageId, message) {
    const exists = document.getElementById(`send-${ messageId }`);
    if (exists) return;
    const send = document.createElement('div');
    send.className = 'send bg-light p-4 fw-bold';
    send.id = `send-${messageId}`;
    send.innerText = `Q. ${ message }`;
    box.appendChild(send);
}

function receiveMessage(box, messageId, message) {
    let receive = document.getElementById(`rec-${ messageId }`);
    if (!receive) {
        receive = document.createElement('div');
        receive.id = `rec-${ messageId }`;
        receive.className = 'receive p-4 bg-secondary text-light';
        box.appendChild(receive);
    }
    receive.innerText += message;
}

function renderDate(messageId, date) {
    const id = `box-${ messageId }`;
    const box = document.getElementById(id);

    const dateBox = document.createElement('div');
    dateBox.className = 'date-box d-flex justify-content-end py-2';
    dateBox.innerText = date;
    box.appendChild(dateBox);
}

function messaging() {
    btn.disabled = true;
    prompt.readOnly = true;
}

function init() {
    console.log('init');
    prompt.value = '';
    prompt.readOnly = false;
    btn.disabled = false;
}

source.addEventListener('end', event => {
    const { data } = event;
    const { content, type, messageId, prompt } = JSON.parse(data);
    const box = document.getElementById(`box-${ messageId }`);
    box?.scrollIntoView(true);
    init();
});

source.addEventListener('date', event => {
    const { data } = event;
    const { content, type, messageId, prompt } = JSON.parse(data);
    renderDate(messageId, content);
});

source.addEventListener('open', event => {
    console.log('open');
});

source.addEventListener('message', event => {
    try {
        const { data } = event;
        const { content, type, messageId, prompt } = JSON.parse(data);
        messaging();
        if (content !== undefined && messageId) renderBox(messageId, prompt, content);
    } catch (e) {
        init();
    }
});


async function openai(prompt) {
    try {
        const { data: { messageId } } = await axios.post('/openai', {
            prompt,
        });
    } catch (e) {
        console.log(e);
        if (e.response && e.response.status && e.response.status === 404) {
            alert(e.response.data || e.response.statusText);
            location.reload();
            return;
        }
        renderBox(`${ new Date().getTime() }`, prompt, e.message.toString());
    }
}
btn?.addEventListener('click', () => {
    openai(prompt?.value);
});

prompt?.addEventListener('keyup', (event) => {
   if (event.ctrlKey && event.key === 'Enter') openai(prompt?.value);
});
index.js는 이벤트를 받아서 화면에 렌더링하는 역할을 합니다.
const source = new EventSource(`/openai`, {
    withCredentials: true,
});
위 코드로 서버와 연결을 맺습니다.(method=GET)
source에 이벤트 리스너를 등록합니다.
open
message
date
end
openai 함수에서 textarea의 값을 가져와서 서버에 전송합니다.(method=POST)
서버에서는 openai api를 호출하고, openai api의 stream을 클라이언트에게 전송합니다.

비싼 GPT-4 API를 사용했습니다. API는 현재 gpt-4 8k(컨텍스트 사이즈)만 가능하고, 32k는 불가능합니다.
자세한 model들은 https://platform.openai.com/account/rate-limits를 참고해주세요.
참고 자료
https://ably.com/blog/websockets-vs-sse
https://github.com/openai/openai-node
https://developer.mozilla.org/ko/docs/Web/API/Server-sent_events/Using_server-sent_events
